
Envas Part 2 - Hello World
In the last blog, I described what Envas is, what it is suitable for and what it is not. Today I will show you the basics of working with the Envas framework and we will create the first Niagara module using Envas - of course a Hello World application.
Installation
The basic Niagara modules that make up the core of the framework are:
- envasCommons-rt.jar
- envas-ux.jar
- envas-wb.jar
You can download all three files in the download section of the Neopsis web site. Install the modules as usual in the directory % NIAGARA_HOME%/modules.
Then create your new Niagara module. You can use the Workbench menu Tools -> New Module to do this. However, if you do not want to start from scratch, you can use the link at the end of this blog and download the complete source code for the Envas HelloWorldApp module. For the impatient developer, the featured zip file contains the compiled jar file as well. In the following text, I will also refer to the source code from the attachment. And, last but not least, the full Envas demo source code is available in the Neopsis GitHub repository
Source code
Minimal Envas application contains two classes. In our example, they are
- BHelloWorldApp.java
- HelloWorldApp.java
BHelloWorldApp
BHelloWorldApp is the Baja application wrapper extending BNvApplication. It must implement the method getDesktopUI() declaring the instance of the main application class.
@NiagaraType
public class BHelloWorldApp extends BNvApplication {

    @Override
    public NvUI getDesktopUI() {
        return new HelloWorldApp();
    }

}
HelloWorldApp
HelloWorldApp is the Envas main application class. You have to override the method init(VaadinRequest), that is the application start point. Here is the full source code of the application.
@Theme("envas")
public class HelloWorldApp extends NvDesktopUI {

    @Override
    protected void init(VaadinRequest request) {

        super.init(request);                                       // 1)

        VerticalLayout layout     = new VerticalLayout();          // 2)
        Label          lblTitle   = new Label("<h2>Welcome to your first Envas application!</h2",
                                              ContentMode.HTML);
        Label          lblStation = new Label("Your Niagara station name is "
                                              + Sys.getStation().getStationName()
                                              + ", your host name is "
                                              + Sys.getHostName());
        TextField      fldEntry   = new TextField("Please enter your name:");
        Button         btnClick   = new Button("Click me, please!");

        btnClick.addClickListener(new Button.ClickListener() {     // 3)

                                      @Override
                                      public void buttonClick(Button.ClickEvent clickEvent) {
                                          String s = "Thank you, ";
                                          layout.addComponent(new Label(s + fldEntry.getValue()));
                                      }

                                  });
        layout.addComponent(lblTitle);                            // 4)
        layout.addComponent(lblStation);
        layout.addComponent(fldEntry);
        layout.addComponent(btnClick);
        layout.setSpacing(true);
        layout.setMargin(true);
        setContent(layout);                                       // 5)
    }
}
If you are familiar with the Swing programming, you will find a lot of similarities. Envas coding is like Swing coding but gives you a web app. The programming model is identical: you create components, add them to a layout, and declare event listeners for user interactions. But, with Envas your GUI is a native web application with easy access to all Niagara internals.
Let we have a short look at the hello world application (please refer to the numbers in the line comments).
- We always need to call the
super.init()method, where Niagara specific initialization occurs. - We create
VerticalLayoutas a wrapper for all user interface components. Then we create all other components we are going to place on out web page -Labels,TextFieldandButton. - Button
ClickListeneris responsible for the interaction with the button. Any button click in the browser is forwarded to the listener'sbuttonClicked()callback. - We place all components on the vertical layout and make some tweaking.
- We set the vertical layout as the main appliction component.
Compile the application and check, if the module envasDemo-wb.jar was created in your modules directory.
Configuration

Before we can use the application, we have to configure it in the Workbench. Start the Workbench, open the Envas palette and install the EnvasAppService in your Niagara Services. Double click the EnvasAppService, the Envas Application Manager opens. Click the New button and confirm to add one NvAppServlet component. In the configuration window, choose envasDemo:HelloWorldApp as the Application and set a name for the property Servlet Name (no dashes, no extra characters, no spaces - demo is fine). Click OK.
License
Envas is a commercial product. However, you will get enough time to try it. Right-click on the EnvasAppService component and select the action Get License. Enter the HostId of your station and click OK to send a request to the Neopsis license server. The license is saved in the SharedUserHome folder. For example, if you run the station from the Niagara Daemon, the license is saved in the folder C:\ProgramData\Niagara4.8\tridium\shared and it is valid for all stations on the host. The license is valid for the next 3 months and can be any time renewed. For commercial licenses, please ask Neopsis.
Usage
Open a browser and navigate to the URL
where servlet-name is the Servlet Name property you set up in the configuration. For most developer it will be the URL:
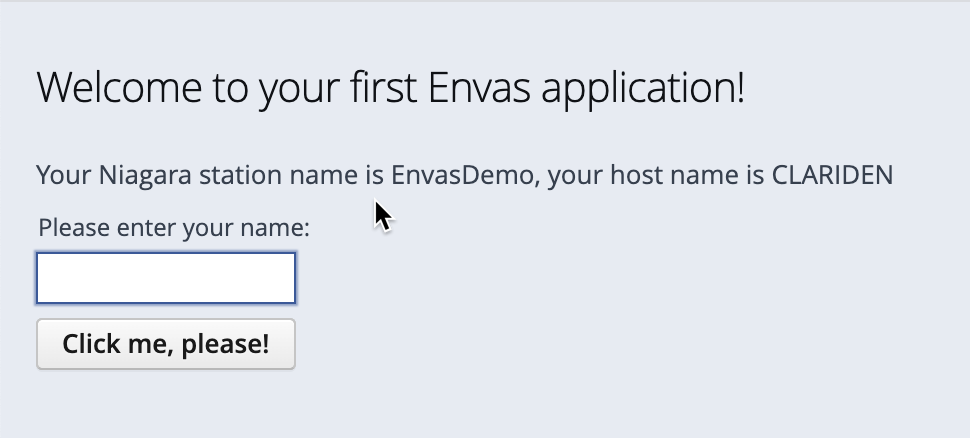
Login to the station and you should see the HelloWorldApp main page:
Next steps
- Try to extend the application with additional UI components. Add combobox, checkbox, tables, images. etc. You can find new ideas here.
- Try to integrate Niagara data like point values. Please remember - the Envas code is running in the station JVM, so there is no need to make an ORD leasing when accessing mounted components.
In the upcoming blogs I will explain another Envas features like Envas Data Binding for Niagara, Themes, Envas Niagara Widgets, Envas as a replacement for PxWidgets and PxViews and much more.
Happy programming.
Robert